BIOS Ultimate Guide – Tips and Tricks Everyone Should Know

What Is BIOS?
BIOS (Basic Input/Output System) is a firmware software that is saved on a little memory chip on the motherboard of your computer. It serves as a bridge between your computer’s hardware and operating system. When you switch on your computer, the BIOS does a power-on self-test (POST) to ensure that all of the hardware is operational. It then locates and loads the operating system into the memory of your computer.
You may need to enter the BIOS on a Windows 10 PC for a variety of reasons. To start from a USB drive or DVD, for example, you may need to change the boot order of your devices, enable or disable hardware components, or change the system time and date. You may also need to access the BIOS to reset the password for your computer’s administrator account or to troubleshoot hardware or operating system issues.
BIOS Evolution
BIOS evolution from early computer systems to current PCs
In the contemporary sense, the first computers did not have a BIOS. Instead, they contained a series of hardcoded bootstrap routines that would initialize the hardware and load the operating system from some sort of external storage, such as a magnetic tape or floppy disk.
As computers became more complicated and dependant on external devices, a more adaptable and flexible mechanism for managing hardware and booting the operating system became necessary. This resulted in the creation of the BIOS as we know it today.
In the early 1980s, IBM developed the first BIOS for its IBM PC. This BIOS was stored in ROM (Read-Only Memory) and included instructions for initializing the hardware and loading the operating system. It also included a simple user interface for customizing system parameters.
The BIOS has changed throughout time to provide new features and capabilities. It is now contained on a motherboard chip and is in charge of a variety of activities including as power management, hardware detection and configuration, and booting the operating system.
In recent PCs, BIOS has been mainly replaced with UEFI (Unified Extensible Firmware Interface). UEFI is a more modern firmware interface that adds capabilities and improves security over BIOS, such as support for larger boot drives and secure boot. However, the name “BIOS” is still routinely used to refer to a computer’s firmware interface, regardless of whether it is BIOS or UEFI.
How BIOS Functions
The BIOS is the first software to start when a computer is turned on. It is stored on a motherboard chip and is in charge of booting the computer and initializing the hardware.
The BIOS starts by checking the hardware components, such as the processor, memory, and storage devices, to ensure that they are working properly. It also looks for any hardware flaws or problems that need to be fixed.
After initializing the hardware, the BIOS searches for a bootable device, such as a hard disk or a USB drive, from which to load the operating system. The BIOS determines which devices to examine for a bootable operating system based on the boot order given in the BIOS parameters.
The BIOS also has a graphical user interface for configuring system parameters. During the boot process, this interface is often accessed by hitting a certain key or key combination. The BIOS settings allow the user to adjust the boot sequence, configure the system time and date, enable or disable hardware components, and create boot and system access passwords.
Overall, the BIOS is critical in starting the computer and preparing it for the operating system to take over. It is a necessary component of any computer system since it acts as a link between the hardware and the operating system.
BIOS Features
The boot order is a BIOS feature that specifies the order in which the BIOS looks for a bootable device when the computer is powered on. The boot order can be adjusted in the BIOS and often includes options like the hard disk, optical drive, and USB drive.
Another BIOS feature that allows the user to set the right time and date for the computer is the system time and date. This is significant because many operating systems and apps track events and conduct tasks using the system time and date.
Another critical BIOS component is system security. It enables the user to set passwords for boot and system access, which can assist prevent unwanted computer access. A boot password, for example, can prohibit someone from booting the computer without first inputting the correct password. A system password prevents unauthorized access to the BIOS settings or modifications to the system setup.
Overall, the BIOS functions covered here are critical for regulating the boot process, establishing the correct time and date, and preserving computer security. They are just a handful of the many functions that may be found in a modern computer’s BIOS.
Updating BIOS
The process of upgrading the BIOS firmware on a computer’s motherboard with a newer version is known as updating the BIOS.
There are various reasons why the BIOS may need to be updated:
- To address bugs: BIOS upgrades may include remedies for issues or bugs found in the current version of the BIOS. Updating the BIOS can help to resolve these issues and enhance the computer’s stability and performance.
- To include new features: BIOS updates may include new features or capabilities not found in the current version. A BIOS update, for example, may include support for a new type of processor or a new feature such as Secure Boot.
- BIOS upgrades may include security fixes or additions to help protect the computer from vulnerabilities or assaults.
There are several methods for updating a computer’s BIOS:
- Using a manufacturer-supplied utility: Many motherboard manufacturers include a utility for updating the BIOS on their motherboards. These programs are normally available for download from the manufacturer’s website and can be used to update the BIOS on the machine.
- Booting from a USB drive with a BIOS update file: Some BIOS updates come in the form of a bootable file that can be copied to a USB device and used to update the BIOS by booting the computer from the USB drive.
Regardless of the technique used to update the BIOS, some steps must be taken to reduce the chance of difficulties. Consider the following potential dangers and precautions:
- Power outage: A power outage during the BIOS update process might result in major difficulties, such as the motherboard being inoperable. It is critical that the computer is plugged into a reliable power supply and that it is not unplugged or shut off throughout the upgrade process.
- Incorrect update file: Using the incorrect BIOS update file or an incorrectly generated update file might also result in issues. It is critical to ensure that the update file used is the correct one for the specific motherboard and BIOS version.
Overall, changing the BIOS on a computer can be a valuable approach to repair problems, introduce new functionality, or increase security. However, it is critical to carefully follow the manufacturer’s recommendations and to be aware of the potential risks and precautions involved.
BIOS manufacturers
BIOS chips and computer firmware are manufactured by a variety of companies. Among the most well-known BIOS producers are:
- American Megatrends (AMI)
- Insyde Software
- Phoenix Technologies
- UEFI Forum (a consortium of companies that develop the Unified Extensible Firmware Interface (UEFI) specification)
Each BIOS vendor develops its own BIOS firmware, which can be used on a variety of motherboards from various manufacturers. BIOS firmware is normally designed to be particular to the motherboard for which it is intended, and using the incorrect BIOS firmware can cause difficulties or prevent the computer from booting properly.
BIOS manufacturers often include utilities and tools for updating the BIOS on a machine. These utilities may be downloadable from the manufacturer’s website or bundled with the motherboard itself.
Overall, BIOS makers play an important role in the creation and maintenance of the firmware interface required for computer booting and management.
Various types of BIOS
Over the years, various distinct forms of BIOS (Basic Input/Output System) have been utilized in computers. Among the most prevalent varieties are:
- ROM BIOS: The early computers employed a ROM (Read-Only Memory) BIOS, which was a set of bootstrap procedures hardcoded into the computer’s memory. These methods were in charge of initializing the hardware and loading the operating system from an external storage device.
- BIOS stored in ROM: Later computers used a BIOS that was stored on the motherboard in ROM. This BIOS was in charge of initializing the hardware and loading the operating system, and it could also be accessed by the user to configure the system.
- BIOS stored on a chip: Most modern computers utilize a BIOS that is saved on a chip on the motherboard. This BIOS is in charge of a variety of activities, such as booting the computer, initializing the hardware, and providing a user interface for system setup.
- UEFI (Unified Extensible Firmware Interface): UEFI is a more powerful firmware interface that, in current computers, has largely supplanted BIOS. It adds functionality and improves security over BIOS, such as support for bigger boot drives and secure boot.
The type of BIOS used in a computer is determined by its age and design. While BIOS has long been the main firmware interface, UEFI is now the industry standard for newer PCs.
UEFI vs. BIOS
BIOS (Basic Input/Output System) and UEFI (Unified Extensible Firmware Interface) are both firmware interfaces in charge of booting a computer and initializing its hardware. There are, however, some significant differences between the two:
- BIOS has been around far longer than UEFI and is still used in older machines. UEFI is a relatively recent innovation that has become the standard firmware interface for current PCs.
- BIOS is intended to function with older hardware and operating systems and may not support some newer features or capabilities. UEFI is intended to be more adaptive and flexible, and it can handle a broader range of hardware and operating systems.
- When opposed to UEFI, BIOS offers a more limited set of functionality. Many extra features and capabilities are included in UEFI, including as support for larger boot drives, a graphical user interface, and secure boot.
- Boot procedure: The boot process for BIOS and UEFI differs slightly. BIOS loads the operating system from a boot sector on a bootable media, whereas UEFI loads the operating system via a boot manager.
BIOS and UEFI are both firmware interfaces in charge of booting a computer and initializing the hardware. UEFI, on the other hand, is a more modern and feature-rich alternative to BIOS that has become the standard firmware interface for most recent PCs.
Accessing BIOS on Windows 10
On a Windows 10 PC, there are numerous ways to access the BIOS:
Method 1: Using the power button
Restart your computer and instantly begin hitting the proper BIOS key. During the POST process, the key to hit is usually presented on the screen and is usually a function key (e.g., F1, F2, F10, etc.), the delete key, or the escape key.
Continue to press the key until the BIOS screen shows.
Method 2: Using the keyboard
Close your computer and unplug it from the power supply.
Find your computer’s BIOS configuration key. During the POST process, this key is frequently displayed on the screen and is commonly a function key (e.g., F1, F2, F10, etc.), the delete key, or the escape key.
While reconnecting the power cord to your computer, press and hold the BIOS setup key.
When the BIOS screen appears, release the BIOS setup key.
Method 3: Using the Boot Menu
Restart your computer and begin pressing the proper key immediately to open the Boot Menu. During the POST process, the key to press is usually presented on the screen and is commonly a function key (e.g., F12, F8, etc.), the escape key, or the tab key.
Continue to press the key until the Boot Menu screen shows.
To access BIOS, use the arrow keys to scroll to the “BIOS Setup” option and hit enter.
Note: Depending on the make and type of your computer, the exact technique for accessing BIOS on your Windows 10 machine may differ. You may need to consult your computer’s documentation or conduct an online search for precise instructions.
Navigating BIOS on Windows 10
Navigating the BIOS on a Windows 10 machine can be difficult, especially if you are unfamiliar with the numerous settings and options accessible. Here are some suggestions for exploring the BIOS on a Windows 10 computer:
- To switch between options, use the arrow keys.
- To select an option or access a submenu, press the enter key.
- To navigate between fields within a submenu, use the tab key.
- To return to the previous screen or exit a submenu, press the escape key.
- To access certain menus or settings, use the function keys (e.g., F1, F2, F10, etc.).
Here are some examples of common BIOS settings and their applications:
- Boot Order: You can choose the order in which your computer searches for bootable devices with this parameter. To boot from a USB device or DVD, you may need to modify the boot order.
- Hardware Settings: This option allows you to enable or disable various hardware components on your computer, such as your network card or USB ports.
- System Time and Date: You can set the current date and time on your computer using this setting.
- Security Settings: This option allows you to set or reset the password for the administrator account on your computer.
- Power Management Settings: This menu allows you to customize your computer’s power management settings, such as the behavior of the power button and the system’s sleep settings.
The options and settings available in BIOS on your Windows 10 computer will vary depending on the make and model. You may need to consult your computer’s documentation or conduct an online search for precise instructions.
Changing BIOS Settings on Windows 10
It is critical to use caution while modifying BIOS settings on a Windows 10 computer, as incorrect modifications can result in major problems with your computer’s hardware or operating system. Here are some pointers for modifying BIOS settings on a Windows 10 computer:
- Before making any changes, carefully read the descriptions of each setting.
- Before making any changes, make a note of the existing settings in case you need to revert to the original settings.
- Before restarting your computer, save your changes and exit BIOS.
The following is a warning regarding the potential repercussions of changing BIOS settings on a Windows 10 computer:
- Setting the boot order incorrectly may prevent your computer from booting properly.
- Disabling critical hardware components may cause your computer to malfunction.
- Changing the system time and date may cause problems with programs and services that rely on them.
- Resetting the administrator account password may prohibit you from accessing certain services or settings on your computer.
- Incorrectly configuring power management settings may cause your computer to act unexpectedly or to fail to power on.
It is generally a good idea to only modify BIOS settings if you are sure in your comprehension of what the changes will do or if you are attempting to diagnose a specific problem. If you’re not sure about a certain setting, it’s usually preferable to leave it alone.
Exiting BIOS on Windows 10
Quitting BIOS on a Windows 10 computer is normally a simple process, but it is critical to save any changes you have made before exiting. On a Windows 10 PC, here’s how to save and leave BIOS:
- Select the “Save and Exit” option. This menu is normally found beneath the “Exit” or “Main” menu and is named “Save Changes and Exit,” “Save and Exit Setup,” or something similar.
- Select the Save Changes and Exit BIOS option. This option is typically named “Save Changes and Reset,” “Save and Exit,” or something along those lines.
- Confirm your desire to save your modifications and exit BIOS.
- Your changes will be saved by BIOS and your machine will be restarted.
There are a few things you can do if you can’t exit BIOS on a Windows 10 computer:
- Examine the screen for any prompts or warnings that may be blocking you from quitting BIOS. For example, before quitting, you may need to affirm that you want to save your modifications.
- Before quitting BIOS, ensure that you have selected the option to save your modifications. You will be unable to exit BIOS if you have made modifications to it but have not saved them.
- To exit BIOS, try using the keyboard. Depending on your computer, you may be able to exit BIOS by pressing the escape key, function keys (e.g., F10, F12), or the delete key.
- Restart your computer and attempt again to access the BIOS. If BIOS was unable to preserve your modifications, your computer may revert to the default settings when you restart it.
Troubleshooting BIOS Issues on Windows 10
When attempting to enter or exit BIOS on a Windows 10 PC, you may encounter the following issues:
- Incorrect key: If you are unable to access BIOS by hitting the relevant key, you may have pressed the incorrect key or the key may be malfunctioning. Try a different key or look for any problems with your keyboard.
- The BIOS screen does not appear: If the BIOS screen does not appear when you attempt to enter BIOS, your computer may not be booting from the correct device or there may be a hardware problem. Try an other method of accessing BIOS (for example, via the power button or the Boot Menu) or look for any hardware issues.
- The BIOS screen appears, but no keys respond: If the BIOS screen shows but you are unable to navigate or make changes using your keyboard, there may be a problem with your keyboard or the BIOS. Try a different keyboard or look for issues with your computer’s hardware.
- The BIOS screen appears, but no changes are saved: If you make changes to BIOS but they are not saved when you quit, there could be a problem with your computer’s hardware or the BIOS itself. Restart your computer and access the BIOS again, or look for any hardware problems.
You can take the following procedures to troubleshoot and resolve these issues:
- Examine the screen for any prompts or messages that may reveal the nature of the problem or how to resolve it.
- Check that you’re using the correct BIOS key and that your keyboard is working properly.
- To gain access to the BIOS, try an alternative technique (e.g. using the power button or the Boot Menu).
- Restart your computer and attempt again to access the BIOS.
- Look for any hardware problems, such as a malfunctioning motherboard or a faulty memory chip.
If none of these alternatives work, you may need to seek additional help. A fault with your computer’s hardware or operating system may prohibit you from entering or exiting BIOS in some instances.
BIOS Setup Screens options
Options for BIOS Setup Screens:
- Main – This section contains general product information such as the BIOS type, processor, RAM, and time/date.
- Advanced – CPU, RAM, IDE, Super IO, trusted computing, USB, PCI, MPS, and other configuration information.
- PCI – Set the server to clean NVRAM on system boot.
- Boot – Set the priority of the boot device (storage drives and the DVD-ROM drive).
- Security – Set or modify the passwords for the user and supervisor.
- Chipset – View the server chipset configuration.
- Exit – allows you to save changes and exit, discard changes and exit, or load optimal or fail-safe defaults.
Main

The BIOS setup screens are a set of screens that allow the user to view and change the BIOS settings for a computer. The options available on the BIOS setup screens can vary depending on the BIOS version and the motherboard it is installed on, but some common options that may be found on the main screen include:
- General product information: This section of the main screen typically displays general information about the computer and its hardware, such as the BIOS type, processor type and speed, amount of installed memory, and current time and date.
- BIOS type: This option typically displays the type and version of the BIOS firmware that is installed on the computer.
- Processor: This option displays information about the processor installed in the computer, such as the type and speed of the processor.
- Memory: This option displays information about the memory installed in the computer, such as the type and amount of memory.
- Time/date: This option allows the user to set the correct time and date for the computer. This is important because many operating systems and applications use the system time and date to track events and perform tasks.
These are just a few examples of the options that may be found on the main screen of the BIOS setup screens. Other options may include settings for boot order, hardware configuration, and system security.
Advanced
The advanced screen of the BIOS setup screens typically provides access to more detailed configuration options for various hardware components and features of the computer. Some of the options that may be found on the advanced screen include:
- CPU (Central Processing Unit) options: These options allow the user to configure settings for the processor, such as the clock speed, voltage, and power management.
- Memory options: These options allow the user to configure settings for the memory, such as the memory timings and frequency.
- IDE (Integrated Drive Electronics) options: These options allow the user to configure settings for the hard drive and other IDE devices, such as the drive order and the transfer mode.
- Super IO options: Super IO (Super Input/Output) options allow the user to configure settings for the motherboard’s Super IO chip, which is responsible for managing input/output operations for various hardware components.
- Trusted computing options: Trusted computing options allow the user to enable or disable features related to trusted computing, such as Trusted Platform Module (TPM) support.
- USB (Universal Serial Bus) options: These options allow the user to configure settings for USB devices, such as the USB controller and the USB legacy support.
- PCI (Peripheral Component Interconnect) options: These options allow the user to configure settings for PCI devices, such as the PCI latency timer and the PCI IRQ routing.
- MPS (Multiprocessor Specification) options: MPS options allow the user to configure settings for multiprocessor systems, such as the MPS version and the MPS table mode.
These are just a few examples of the options that may be found on the advanced screen of the BIOS setup screens. Other options may be available depending on the BIOS version and the specific motherboard. These options can be used to fine-tune the configuration of the computer and optimize its performance and functionality.
PCI
The PCI (Peripheral Component Interconnect) screen of the BIOS setup screens typically provides options for configuring settings related to PCI devices on the computer. One option that may be found on this screen is the ability to configure the server to clear NVRAM (Non-Volatile Random Access Memory) during system boot.
NVRAM is a type of memory that retains its data even when the computer is powered off. It is often used to store system configuration information and other important data. The option to clear NVRAM during system boot allows the user to reset the NVRAM to its default state when the computer is booted.
There are a few different reasons why this option might be useful:
- Troubleshooting: If the computer is experiencing problems and the user suspects that the NVRAM may be causing or contributing to the issue, clearing the NVRAM during boot may help to resolve the problem.
- Security: Clearing the NVRAM during boot can help to ensure that any sensitive data or information stored in the NVRAM is erased when the computer is booted. This can be useful for maintaining security, particularly on shared computers or in public environments.
- System configuration: Clearing the NVRAM during boot can also be useful for resetting the system configuration to its default state. This can be helpful if the user has made changes to the system configuration that are causing problems or if the user simply wants to start over with a fresh configuration.
The option to clear NVRAM during system boot is a useful feature that can be used for troubleshooting, security, and system configuration purposes. It is just one example of the many options that may be found on the PCI screen of the BIOS setup screens.
Boot
The boot screen of the BIOS setup screens typically provides options for configuring the boot process for the computer. One important option that may be found on this screen is the ability to configure the boot device priority.
The boot device priority determines the order in which the BIOS will check for a bootable device when the computer is turned on. This can be useful if the user wants to specify a particular device as the primary boot device, or if the user wants to change the order in which the BIOS checks for bootable devices.
For example, the user may want to set the hard drive as the primary boot device, with the DVD-ROM drive as the secondary boot device. This would cause the BIOS to first check the hard drive for a bootable operating system, and then check the DVD-ROM drive if no bootable operating system is found on the hard drive.
The boot device priority can be configured by selecting the desired device from a list of available devices and using the up or down arrow keys to move it to the desired position in the boot order. The topmost device in the list will be the first device checked by the BIOS for a bootable operating system.
The option to configure the boot device priority is an important feature that allows the user to specify the order in which the BIOS checks for bootable devices. It is just one example of the many options that may be found on the boot screen of the BIOS setup screens.
Security

The security screen of the BIOS setup screens typically provides options for configuring the security settings for the computer. One important option that may be found on this screen is the ability to set or change the user and supervisor passwords.
The user and supervisor passwords are used to protect access to the BIOS settings and to the computer itself. The user password is typically used to prevent unauthorized users from accessing the BIOS settings, while the supervisor password is used to prevent unauthorized users from booting the computer or making changes to the system configuration.
To set or change the user or supervisor password, the user will typically need to enter the current password (if one is already set) and then enter the new password twice to confirm it. The user may also be required to enter a hint or some other form of security information to help the user remember the password.
It is important to choose strong and unique passwords for the user and supervisor passwords to help protect the computer from unauthorized access. Using weak or easily guessable passwords can make it easier for someone to gain unauthorized access to the computer.
The option to set or change the user and supervisor passwords is an important feature that allows the user to secure access to the BIOS settings and the computer itself. It is just one example of the many options that may be found on the security screen of the BIOS setup screens.
Chipset
The chipset screen of the BIOS setup screens typically provides options for viewing and configuring the chipset on the motherboard of the computer. The chipset is a group of microchips on the motherboard that manages the data flow between the processor, memory, and other peripherals.
On the chipset screen, the user may be able to view the configuration of the server chipsets, such as the type and version of the chipset, and any available options or settings for configuring the chipset.
Some examples of options that may be available on the chipset screen include:
- Memory configuration: These options allow the user to configure settings for the memory, such as the memory timings and frequency.
- PCI Express configuration: These options allow the user to configure settings for PCI Express devices, such as the PCI Express lane configuration and the PCI Express ASPM (Active State Power Management) settings.
- USB configuration: These options allow the user to configure settings for USB devices, such as the USB controller and the USB legacy support.
- SATA (Serial ATA) configuration: These options allow the user to configure settings for SATA devices, such as the SATA mode and the SATA controller configuration.
Exit
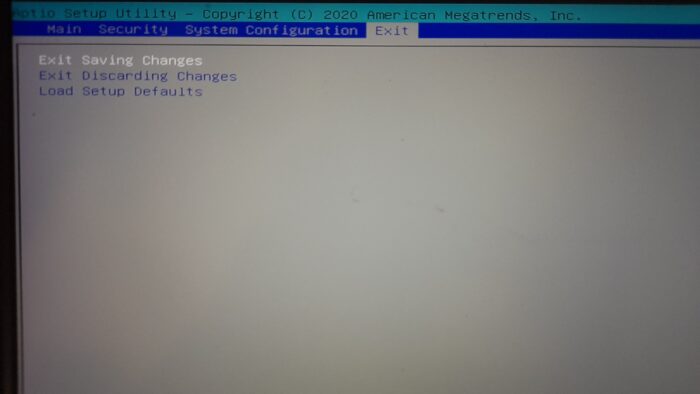
The exit screen of the BIOS setup screens provides options for saving or discarding changes to the BIOS settings and exiting the BIOS setup program. Some of the options that may be found on this screen include:
- Save changes and exit: This option saves any changes the user has made to the BIOS settings and exits the BIOS setup program. The computer will then be restarted using the new BIOS settings.
- Discard changes and exit: This option discards any changes the user has made to the BIOS settings and exits the BIOS setup program. The computer will then be restarted using the original BIOS settings.
- Discard changes: This option discards any changes the user has made to the BIOS settings, but does not exit the BIOS setup program. The user can continue to make changes to the BIOS settings or exit the program at a later time.
- Load optimal defaults: This option loads the default BIOS settings that are optimized for the computer’s hardware. These settings are typically the recommended settings for most users and can provide the best overall performance and stability.
- Load fail-safe defaults: This option loads the default BIOS settings that are designed to be stable and safe. These settings may not provide the best performance, but are less likely to cause problems or conflicts with the hardware.
The exit screen of the BIOS setup screens provides options for saving or discarding changes to the BIOS settings and exiting the BIOS setup program. It is an important screen that allows the user to apply or revert changes to the BIOS settings and restart the computer.
Conclusion
Finally, accessing and navigating the BIOS on a Windows 10 machine might be beneficial for troubleshooting issues, altering hardware settings, or changing the boot order of your devices. On a Windows 10 machine, you can reach the BIOS via many means, including the power button, the keyboard, or the Boot Menu. The arrow keys are used to traverse between options, the enter key to pick an option or open a submenu, and the escape key to return to the previous screen or exit a submenu.
It is critical to use caution while modifying BIOS settings, as incorrect modifications can result in major problems with your computer’s hardware or operating system. It is generally a good idea to only make changes to BIOS settings if you are sure in your comprehension of what the changes will do or if you are attempting to diagnose a specific problem. If you’re not sure about a certain setting, it’s usually preferable to leave it alone.
On a Windows 10 machine, navigate to the “Save and Exit” menu and choose the option to save your changes and exit BIOS. If you have any issues entering or exiting BIOS, you can troubleshoot the problem by looking for any prompts or messages on the screen, utilizing a different method to access BIOS, or checking for any hardware issues.
Most BIOS systems provide the following functions:
- Changing the boot order allows you to specify which devices the computer will attempt to boot from first. This can be useful if you want to boot from a USB drive or a secondary hard drive.
- Loading the BIOS setup defaults will restore the BIOS settings to their factory defaults. This can be useful if you have made changes to the BIOS settings and want to revert back to the original configuration.
- Flashing (updating) the BIOS involves replacing the current BIOS software with a newer version. This can be useful if you are experiencing issues with the current BIOS or if you want to take advantage of new features that are not available in the current version.
- Creating or deleting a BIOS password allows you to set a password that must be entered before the computer will boot up. This can be used to prevent unauthorized access to the computer.
- Changing the date and time allows you to set the current date and time in the BIOS, which is used to keep track of the time even when the computer is powered off.
- Changing floppy drive settings allows you to configure the settings for any floppy drives that are connected to the computer.
- Changing hard drive settings allows you to configure the settings for any hard drives that are connected to the computer.
- Changing CD/DVD/BD drive settings allows you to configure the settings for any CD, DVD, or Blu-ray drives that are connected to the computer.
- Viewing the amount of memory installed allows you to see how much RAM is installed in the computer.
- Changing the boot up num lock status allows you to specify whether the num lock key should be on or off when the computer boots up.
- Enabling or disabling the computer logo allows you to specify whether the computer’s manufacturer logo should be displayed when the computer is booting up.
- Enabling or disabling the quick Power On Self Test (POST) allows you to specify whether the computer should perform a brief test of its hardware when it is powered on.
- Enabling or disabling the CPU internal cache allows you to enable or disable the cache memory that is built into the CPU.
- Enabling or disabling the BIOS caching allows you to specify whether the BIOS should use cache memory to speed up its operations.
- Changing the CPU settings allows you to configure various settings for the CPU, such as the clock speed and voltage.
- Changing the memory settings allows you to configure various settings for the RAM, such as the speed and timing.
- Changing system voltages allows you to adjust the voltage levels that are supplied to the various components of the computer.
- Enabling or disabling RAID allows you to specify whether the computer should use multiple hard drives in a RAID configuration.
- Enabling or disabling the onboard USB allows you to specify whether the computer should use the USB ports that are built into the motherboard.
- Enabling or disabling the onboard IEEE1394 allows you to specify whether the computer should use the IEEE1394 ports (also known as Firewire) that are built into the motherboard.
- Enabling or disabling the onboard audio allows you to specify whether the computer should use the audio capabilities that are built into the motherboard.
- Enabling or disabling the onboard floppy controller allows you to specify whether the computer should use the floppy drive controller that is built into the motherboard.
- Enabling or disabling the onboard serial or parallel ports allows you to specify whether the computer should use the serial or parallel ports that are built into the motherboard.
- ACPI (Advanced Configuration and Power Interface) is a power management specification that allows the operating system to control the power states of the computer and its devices. When ACPI is enabled in the BIOS, the operating system can use it to put the computer into different power states (such as sleep or hibernate) and to manage the power consumption of devices. Enabling or disabling ACPI in the BIOS allows you to specify whether the computer should use ACPI to manage power and device power states. If you disable ACPI, the operating system will not be able to use it to control power management, and the computer may not be able to enter certain power states. In some cases, disabling ACPI may also prevent the operating system from detecting certain devices or may cause other issues with device management. It is generally recommended to leave ACPI enabled in the BIOS unless you are experiencing specific issues that require you to disable it.
- Changing the ACPI suspend type allows you to specify the power state that the computer should enter when it is put into a low power mode.
- Changing the power button function allows you to specify what action the power button should take when it is pressed (e.g. power on, power off, sleep).
- Changing the power-on settings allows you to specify what should happen when the computer is powered on (e.g. boot from a specific device, enter the BIOS setup).
- Changing which display gets initialized first on multi-display setups allows you to specify which of the multiple displays connected to the computer should be initialized first.
- Resetting the Extended System Configuration Data (ESCD) allows you to clear the ESCD and rebuild it with the current hardware configuration. This can be useful if the computer is having trouble detecting new hardware.
- Enabling or disabling the BIOS control of system resources allows you to specify whether the BIOS should control the allocation of system resources (e.g. IRQs, DMA channels) or whether the operating system should handle this.
- Altering the fan’s speed settings allows you to specify how fast the computer’s fans should run.
- Viewing CPU and system temperatures allows you to see the current temperature of the CPU and other system components.
- Viewing the fan speeds allows you to see the current speed of the computer’s fans.
- Viewing system voltages allows you to see the current voltage levels of the various components of the computer.