(SOLVED) VMware Workstation 14.1.7/12.5.9/15.5 Pro Can’t Run On Windows – version 1903 update – [Problem Fixed]
(SOLVED) VMware Workstation 12.5.9 Pro Can’t Run On Windows – version 1903 update – [Problem Fixed]
Method 1 – VMware Workstation Pro Can’t Run On Windows (Solution 1) – Uninstalling Windows Updates.
Topics Covered :
- Create A Restore Point In Windows 10.
- Uninstall Windows 10 Updates Manually.
- Temporarily Prevent A Driver Or Update From Reinstalling In Windows 10.
- Show Or Hide Specific Update In Windows 10.
Method 2 – VMware Workstation Pro Can’t Run On Windows (Solution 2) – Disabling vmplayer.exe and vmware.exe from the Compatibility Administrator.
Topics Covered :
- Solving VMware Workstation Pro Can’t Run On Windows [ADK] (Without Uninstalling Updates
- How To Download and install the Windows ADK.
- How To Install Compatibility Administrator Utility In Windows 10.
After installing new Cumulative Update, VMware Workstation software cannot start. And The Following Error Pops Up VMware Workstation Pro can't run on Windows
Check for an updated version of this app that runs on Windows.
Compatibility Assistant
Check for updates - Dismiss

Creating a restore point is recommended before making any change to your operating system.
Here’s how to Fix VMware Workstation Pro 14.1.7/12.5.9/15 not starting on your Windows 10 1903 PC/Computer/Laptop. To resolve this “VMware Workstation Pro can’t run on Windows” issue (Problem/Error), You may try to remove currently installed updates from your Windows: In this Video i have shown, exactly how i resolved this problem. Basically the problem occurred after installing some updates. If you uninstall previously installed updates, your VMware Workstation should work without any issue. Finally, You Can Prevent / Stop Specific Updates from reinstalling.
Other Video Guide (With Audio)
HOW TO CREATE A RESTORE POINT IN WINDOWS 10.
This enables you to revert your PC to an earlier point in case you run into operating system problems.
Step 1. Open Start.

Step 2. Search for Create a restore point, and click the top result to open the System Properties.

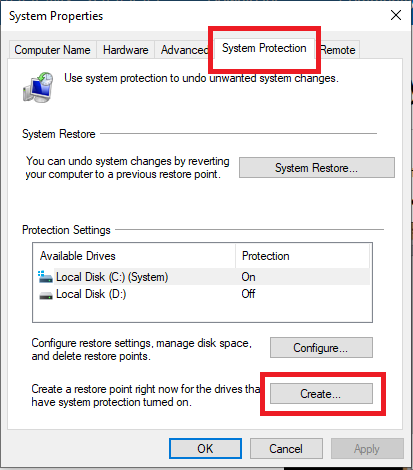
Step 3. Under the “Protection Settings” section, click the Create button.
Step 4. Type a descriptive name for the restore point — for example, “Vmware Workstation Pro Can’T Run On Windows Restore Point”.

Step 5. Click the Create button.

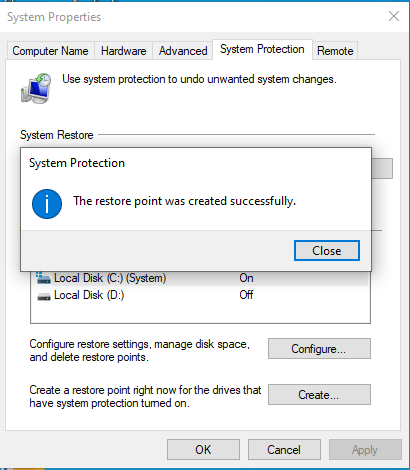
Step 6. Wait for the process to complete and close the window.
HOW TO UNINSTALL WINDOWS 10 UPDATES MANUALLY.
It’s easy to remove specific windows 10 updates and drivers manually.
Step 0. Open Start Menu.

Step 1. Open Settings and click on “Update & security”.

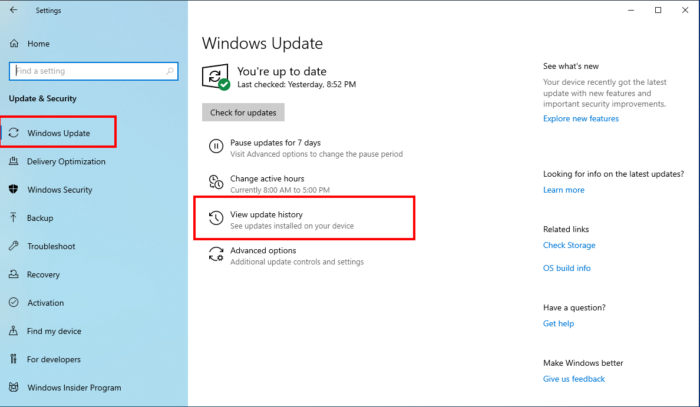
Step 2. Click on “Windows Update” on the left and then on “View update history”.
Step 3. On the next screen, click on “Uninstall updates”.

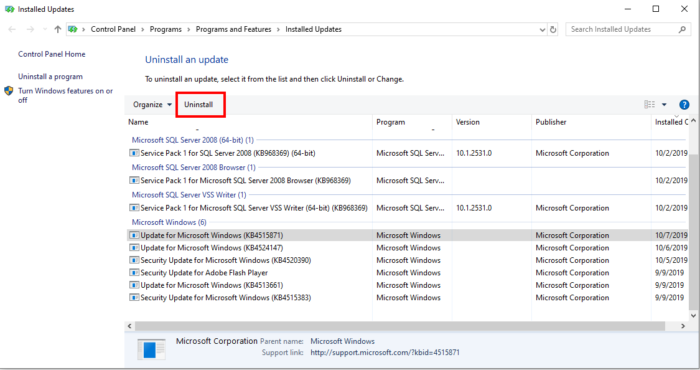
Step 4. Select the update you want to uninstall and simply click the “Uninstall” button.
HOW TO SHOW OR HIDE SPECIFIC UPDATE IN WINDOWS 10.
This can be achieved by using a free utility for windows 10 known as ” Show or hide Troubleshooter”. – https://support.microsoft.com/en-us/help/3073930/how-to-temporarily-prevent-a-driver-update-from-reinstalling-in-window .
HOW TO TEMPORARILY PREVENT A DRIVER OR UPDATE FROM REINSTALLING IN WINDOWS 10.
Preventing a driver or update from reinstalling can be done using a microsoft tool called “Show or Hide Troubleshooter”.
Step 1. Open Start Menu.
Step 2. Select Settings.
Step 3. Open Settings and click on “Update & security”.
Step 4. Click on “Windows Update” on the left and then on “View update history”.
Step 5. click on “Uninstall updates”.
Step 6. To uninstall the unwanted update, select it from the list and then click Uninstall.
Step 7. Download “Show or Hide Updates” troubleshooter from the Microsoft Download Center.
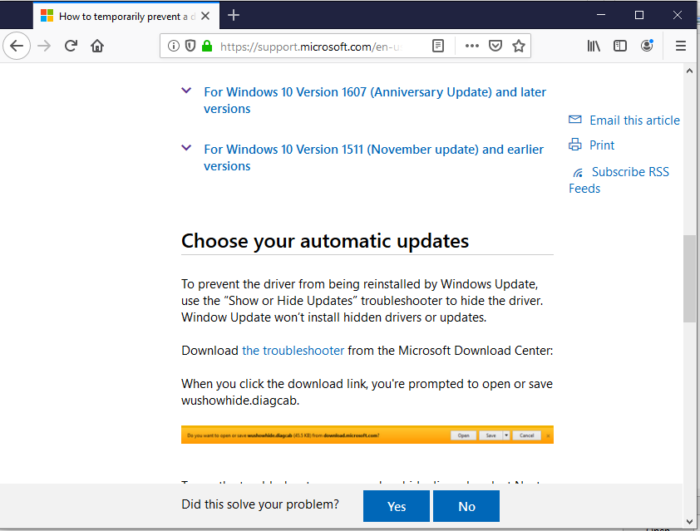
Step 8. You will be prompted to open or save wushowhide.diagcab.

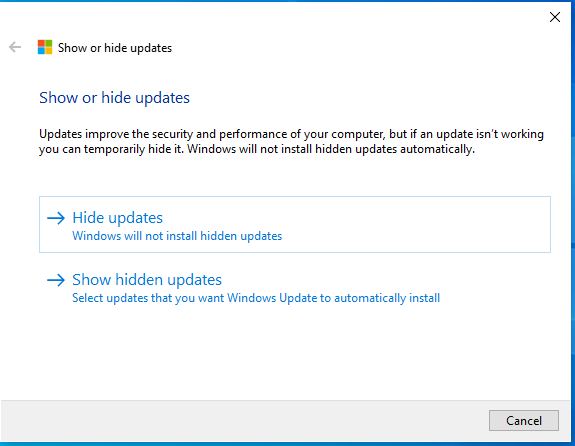
Step 9. Opening wushowhide.diagcab will launch the troubleshooter.
Step 10. Then click Next to proceed and follow the instructions provided by the troubleshooter to hide the problematic driver or update.

Step 11. Choose Hide Updates.
Step 12. Select the Update that you don’t want to be installed and click Next.

Step 13. Wait until the troubleshooter applies the appropriate changes on your system and then Close “Show Or Hide Troubleshooter final window”.
This Guide shows how to solve vmware workstation pro can’t run on windows problem.
This issue started after cumulative windows updates.
So to solve this problem am going to uninstall previously Or recently installed windows updates and block them from reinstalling using “Show Or Hide Troubleshooter tool”.
Before uninstalling the updates I will create a restore point.
Restore point helps in reverting operating system to an earlier point incase you run into issues.
To create system restore point click on start menu then type “create a restore point”.
Choose “Create a restore point” from the results”.
Under “system properties” select “System Protection Tab”, and click create.
Type a description to help you identify the restore point.
Click create and wait for a few moments.
Now am going to uninstall specific updates.
Vmware workstation pro stopped working after installing these updates and am going to get rid of them.
Click start menu.
Open Settings and click on “Update & security”.
Click on “Windows Update” on the left pane and then on “View update history”.
click on “Uninstall updates”.
Click the update you want to uninstall and click “uninstall” button.
Remove The Updates You intent to uninstall and do not restart your pc after each un installation process.
You can choose to restart you computer later (When selected updates are uninstalled) to save time.
After uninstalling specific update block them from reinstalling using “Show or Hide Updates” troubleshooter from the Microsoft Download Center.
The link is provided in the description below.
Download “Show or Hide Updates” troubleshooter from the Microsoft Download Center.
You will be prompted to open or save wushowhide.diagcab.
Opening wushowhide.diagcab will launch the troubleshooter.
Then click Next to proceed and follow the instructions provided by the troubleshooter to hide the problematic driver or update.
After blocking all unwanted updates. Restart your computer.
Then start “Vmware workstation pro”.
As you can see i have solved the problem and “Vmware workstation pro” is working.

After reverting back to the previous build. The software works perfectly.

How to solve VMware Workstation Pro Can’t Run On Windows using The Windows Assessment and Deployment Kit (ADK) Without Uninstalling Updates.
Video 2 (Using Compatibility Administrator Utility (ADK))
To Stop VMware Workstation Pro Can’t Run On Windows Error Message,
Step 1. Download And Install The Windows Adk.
Download and install the Windows ADK from microsoft – https://docs.microsoft.com/it-it/windows-hardware/get-started/adk-install

Step 2. After Download Process Finishes Run The Downloaded File.

Step 3. On First Window Select Change And Click Continue.
Step 4. Select Checkbox Next To It And Click On Change Button.
By default application compatibility tool is disabled.
Step 5. Now Go To Start Menu And Type “Compatibility Administrator”.
Step 6. Select “Compatibility Administrator (64-Bit) Or (32-Bit))” From The Results.

Step 7. On The Left Hand Side Click On Applications.
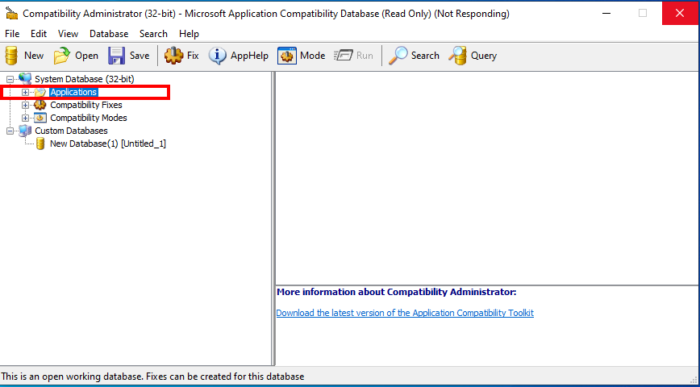
Step 8. Scroll Down And Search For Vmware Workstation Pro And Click On It.

Step 9. On The Right Side You Will See Two Items (Vmware And Vmplayer).
Step 10. Right Click On Each And Click Disable Entry.

To deactivate these items (Vmware.exe and Vmplayer.exe), Right click On each and click disable entry. Notice that the icon changes after you click disable entry.
Now Run Vmware workstation again and as you can see its working.

